import networkx as nx
%matplotlib inline

# import matplotlib.pyplot as pltNetworkX Introduction
 .
- NetworkX is a Python package for the creation, manipulation, and study of the structure, dynamics, and functions of complex networks.
- It is free software released under the BSD-new license.
- Developer: Los Alamos National Laboratory
NetworkX installation
- Installation:
python -m pip install networkx conda install ipykernel --update-deps --force-reinstall
Import Network-X
- Recall that
importstatements go at the top of your code, telling Python to load an external module. - In this case we want to load NetworkX, but give it a short alias
nx - NOTE: Lines starting with the
%character are not Python code, they are “magic” directives for Jupyter notebook.- The
%matplotlib inlinemagic tells Jupyter Notebook to draw graphics inline - i.e. in the notebook. This magic should be used right after the import statement.
- The
Let’s check the installed version of NetworkX. Version 2 is incompatible with v1, so we want to make sure we’re not using an out of date package.
nx.__version__'3.3'A note on naming conventions
- Usually in Python, variables are named in
snake_case, - i.e. lowercase with underscores separating words.
- Classes are conventionally named in
CamelCase, i.e. with the first letter of each word capitalized. - Obviously NetworkX doesn’t use this convention, often using single capital letters for the names of graphs.
- This is an example of convention leaking from the world of discrete mathematics.
- Since most of the documentation you will find online uses this convention, we will follow it as well.
Creating graphs in NetworkX
In the software, graphs are stored using NetworkX graph objects, commonly denoted as G
There are several ways to create these
- Load the graph from a file into the NetworkX graph object
- Use a graph generator
- Build the graph up from scratch
- Build the graph up from scratch
In the following examples we explore these different methods
NOTE: We intentionally repeat the import statements, so that the code chunk is fully “self-contained”.
- That way it could be copied into a regular Python file and recycled more easily
- That way it could be copied into a regular Python file and recycled more easily
NOTE: If the image doesn’t show up in VS code then do the following
- click the three dots on the left of the screen.
- Then click “change presentation” and then select the image format instead of “text”.
Building a graph from scratch: example-1
In the following example the names of the nudes are just their indices
The NetworkX “draw” command is built on top of MatPlotLib
- You can think of it as a new MPL command for the special case of Network objects
import networkx as nx
import matplotlib.pyplot as plt

#------------------
# INITIALIZE GRAPH OBJECT
#------------------
G = nx.Graph()
print(type(G))

#------------------
#CREATE NODES
#------------------

# ADD ONE NODE
G.add_node(0)

# ADD SEVERAL NODES
G.add_nodes_from([1,2,3,4])

#------------------
#CREATE EDGES
#------------------

# ADD ONE EDGE
G.add_edge(0,1)

# ADD SEVERAL EDGES WITH LIST OF 2-TUPLES
G.add_edges_from([(0,2),(0,3),(0,4),(1,2)])

#------------------
# DRAW THE GRAPH
#------------------
nx.draw(G, with_labels=True)
plt.show()
<class 'networkx.classes.graph.Graph'>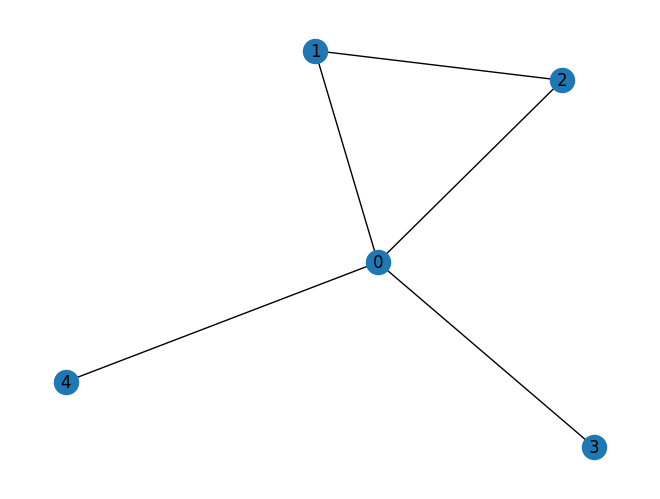
Building a graph from scratch: example-2
- This example is similar to the last one, except we assign names to the nodes, in the form of strings.
import networkx as nx
import matplotlib.pyplot as plt

#------------------
# INITIALIZE THE GRAPH OBJECT
# A "PLAIN" GRAPH IS UNDIRECTED
#------------------
G = nx.Graph()
print(type(G))

#------------------
#CREATE NODES
#------------------
# GIVE EACH A NODE A 'NAME', WHICH IS A LETTER IN THIS CASE.
G.add_node('a')

# THE ADD_NODES_FROM METHOD ALLOWS ADDING NODES FROM A SEQUENCE, IN THIS CASE A LIST
nodes_to_add = ['b', 'c', 'd']
G.add_nodes_from(nodes_to_add)

#------------------
#CREATE EDGES
#------------------
# add edge from 'a' to 'b'
# SINCE THIS GRAPH IS UNDIRECTED, THE ORDER DOESN'T MATTER HERE
G.add_edge('a', 'b')

# JUST LIKE ADD_NODES_FROM, WE CAN ADD EDGES FROM A SEQUENCE
# EDGES SHOULD BE SPECIFIED AS 2-TUPLES
edges_to_add = [('a', 'c'), ('b', 'c'), ('c', 'd')]
G.add_edges_from(edges_to_add)

#------------------
# DRAW THE GRAPH
#------------------
nx.draw(G, with_labels=True)
plt.show()
<class 'networkx.classes.graph.Graph'>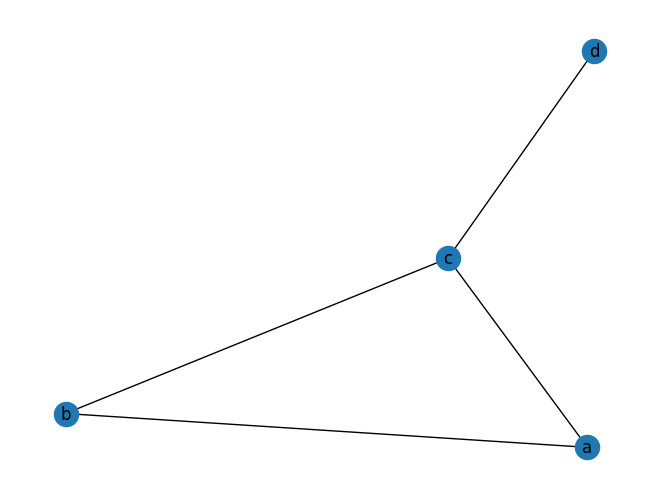
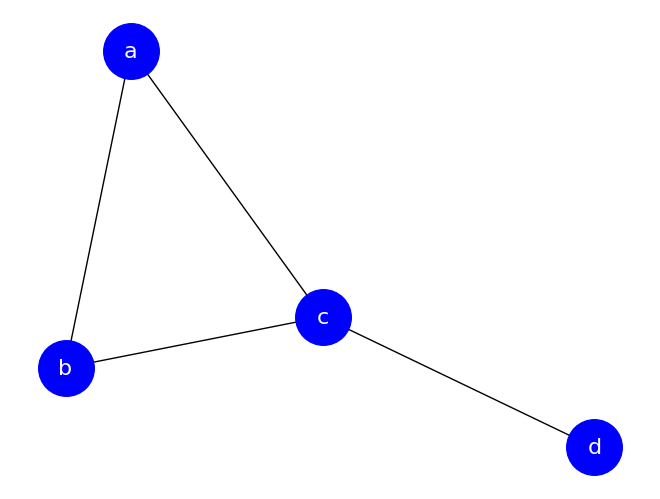
There are many optional arguments to the draw function to customize the appearance.
#CUSTOMIZE THE GRAPH A BIT
nx.draw(G,
        with_labels=True,
        node_color='blue',
        node_size=1600,
        font_color='white',
        font_size=16,
        )
Node names
- The node names don’t have to be single characters or integers
- They can be strings or integers or any immutable object, and the types can be mixed.
- The example below uses strings and integers for names.
G = nx.Graph()

G.add_nodes_from(['cat','dog','virus',13])

G.add_edge('cat','dog')
G.add_edge('virus','dog')
G.add_edge(13,'dog')


nx.draw(G, with_labels=True, font_color='white', node_size=1000)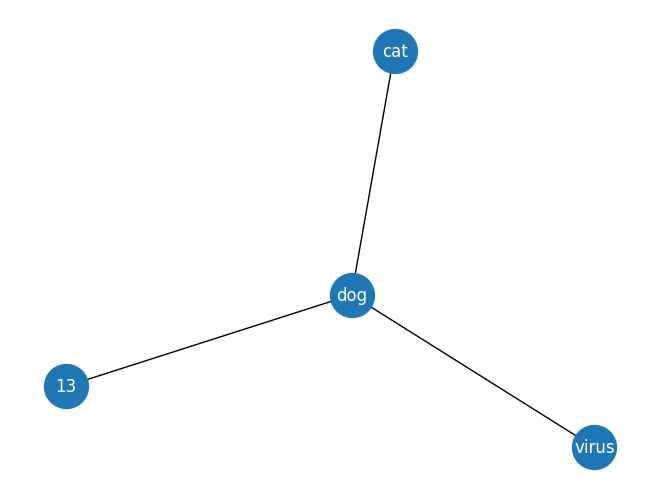
Building a graph using a graph generator:
NetworkX many built in network generators
- for more see the following link https://networkx.org/documentation/stable/reference/generators.html
import networkx as nx
import matplotlib.pyplot as plt

#FUNCTION FOR NETWORK PLOTTING
def draw_network(G):
    #CUSTOMIZE GRAPH A BIT
    nx.draw(G,
        with_labels=True,
        node_color='blue',
        node_size=1600,
        font_color='white',
        font_size=16,
        )
    plt.show()

#GENERATE SEVERAL NETWORKS AND PLOT
N=10

print("Complete graph: i.e. fully connected ")
G = nx.complete_graph(N)
draw_network(G)

print("Binomial tree network")
G = nx.binomial_tree(3)
draw_network(G)

print("Star graph")
G = nx.star_graph(N)
draw_network(G)

print("hexagonal_lattice_graph")
G = nx.hexagonal_lattice_graph(2,2)
draw_network(G)

print("karate_club_graph")
G = nx.karate_club_graph()
draw_network(G)
Complete graph: i.e. fully connected 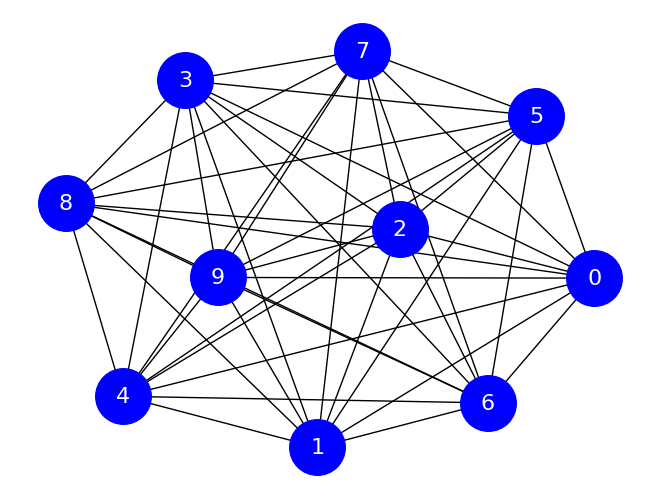
Binomial tree network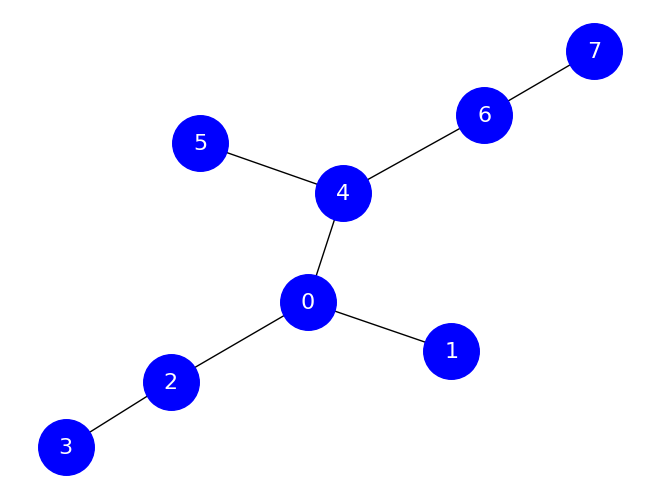
Star graph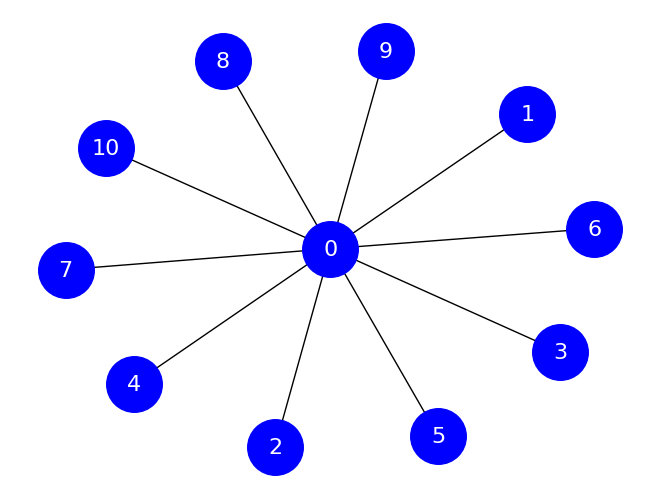
hexagonal_lattice_graph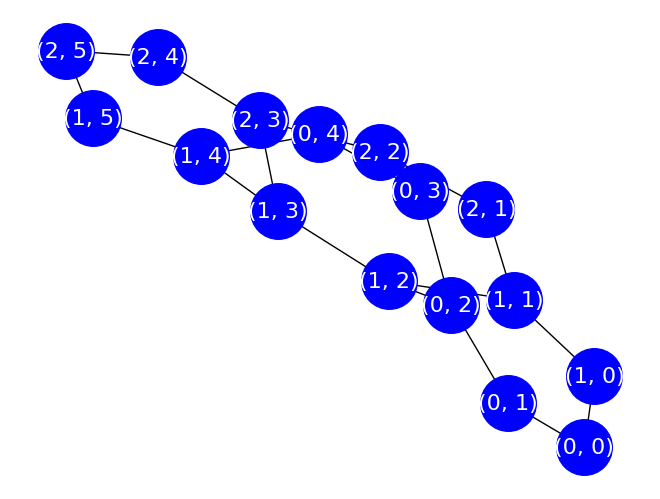
karate_club_graph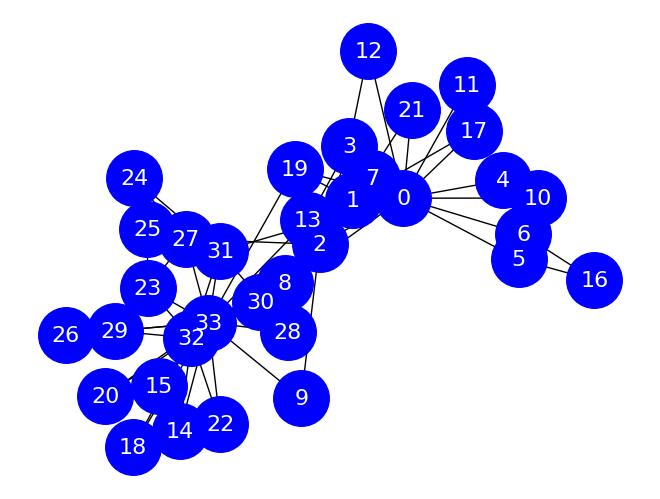
Adjacency lists
One compact way to represent a graph is an adjacency list. This is most useful for unweighted graphs, directed or undirected. In an adjacency list, each line contains some number of node names. The first node name is the “source” and each other node name on the line is a “target”. For instance, given the following adjacency list:
a d e
b c
c
d
e
the edges are as follows:
(a, d)
(a, e)
(b, c)
The nodes on their own line exist so that we are sure to include any singleton nodes. Note that if our graph is undirected, we only need to specify one direction for each edge. Importantly, whether the graph is directed or undirected is often not contained in the file itself – you have to infer it. This is one limitation of the format.
In the datasets directory, there is a file called friends.adjlist. It’s a plain text file, so you can open it on your computer or in GitHub, but here are its contents:
print(open('friends.adjlist').read())George Frank Dennis
Dennis Claire Esther
Claire Frank Alice Esther
Bob Alice
Frank Alice
Alice
Esther
Shelly
NetworkX provides a way to read a graph from an adjacency list: nx.read_adjlist(). We will name this graph SG, for social graph.
SG = nx.read_adjlist('friends.adjlist')We know how to draw this graph:
nx.draw(SG, node_size=2000, node_color='lightblue', with_labels=True)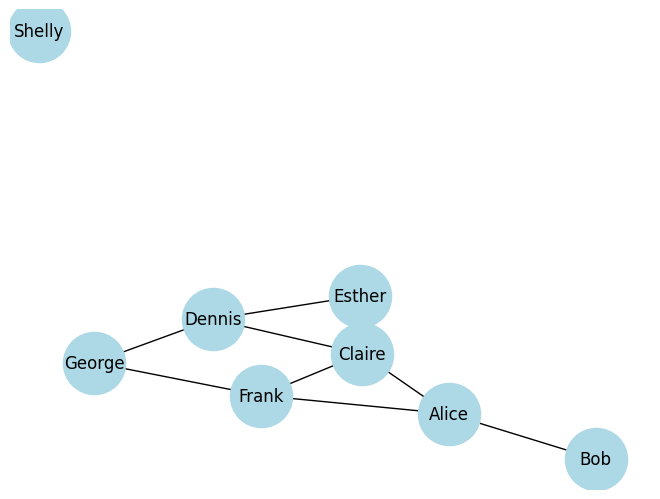
And we know how to get information such as the number of friends linked from a node:
SG.degree('Alice')3Methods of the NetworkX graph object class
The graph object has some properties and methods giving data about the whole graph.
# CREATE A COMPLETE GRAPH
G = nx.complete_graph(5)
nx.draw(G)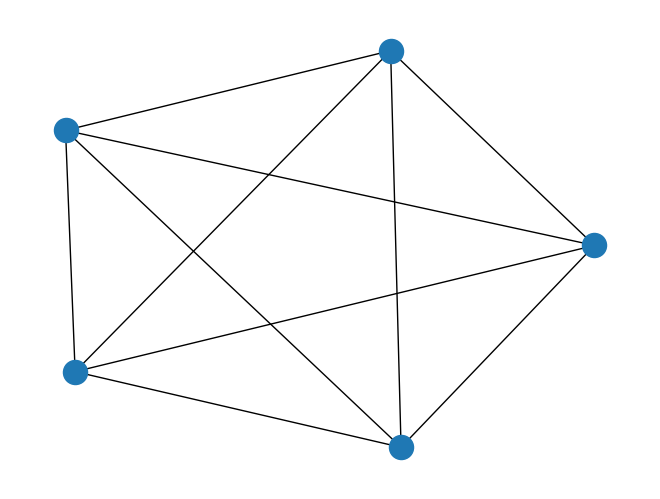
# List all of the nodes
print(G.nodes())
[0, 1, 2, 3, 4]# List all of the edges
print(G.edges())[(0, 1), (0, 2), (0, 3), (0, 4), (1, 2), (1, 3), (1, 4), (2, 3), (2, 4), (3, 4)]NodeView and EdgeView objects have iterators, so we can use them in for loops:
for node in G.nodes:
    print(node)
0
1
2
3
4for edge in G.edges:
print(edge)(0, 1)
(0, 2)
(0, 3)
(0, 4)
(1, 2)
(1, 3)
(1, 4)
(2, 3)
(2, 4)
(3, 4)Note that the edges are given as 2-tuples, the same way we entered them.
We can get the number of nodes and edges in a graph using the number_of_ methods.
print(G.number_of_nodes())5print(G.number_of_edges())10Some graph methods take an edge or node as argument. These provide the graph properties of the given edge or node. For example, the .neighbors() method gives the nodes linked to the given node:
For performance reasons, many graph methods return iterators instead of lists. They are convenient to loop over:
for neighbor in G.neighbors(0):
    print(neighbor)
1
2
3
4and you can always use the list constructor to make a list from an iterator:
list(G.neighbors(1))[0, 2, 3, 4]NetworkX functions vs. Graph methods
The previous data are available via graph methods, i.e. they are called from the graph object:
G.<method_name>(<arguments>)While several of the most-used NetworkX functions are provided as methods, many more of them are module functions and are called like this:
nx.<function_name>(G, <arguments>)that is, with the graph provided as the first, and maybe only, argument. Here are a couple of examples of NetworkX module functions that provide information about a graph:
nx.is_tree(G)Falsenx.is_connected(G)TrueNode and edge existence
To check if a node is present in a graph, you can use the has_node() method:
G.has_node(0)TrueG.has_node('x')FalseAdditionally, the loop syntax used above: for n in G.nodes suggests another way we can check if a node is in a graph:
1 in G.nodesTrueLikewise we can check if two nodes are connected by an edge:
G.has_edge('a', 'b')FalseG.has_edge(0, 1)True(0,1) in G.edgesTrueNode degree
One of the most important questions we can ask about a node in a graph is how many other nodes it connects to.
Using the
.neighbors()method from above, we could formulate this question as so:
len(list(G.neighbors(0)))4but this is such a common task that NetworkX provides us a graph method to do this in a much clearer way:
G.degree(0)4Aside: comprehensions
- Often we have one sequence of values and we want to generate a new sequence by applying an operation to each item in the first.
- List comprehensions and generator expressions are compact ways to do this.
- List comprehensions are specified inside square brackets, and immediately produce a list of the result.
items = ['spider', 'y', 'banana']
[item.upper() for item in items]
['SPIDER', 'Y', 'BANANA']In the context of NetworkX, this is often used to do something with the node or edge lists:
print(G.nodes())
print([G.degree(n) for n in G.nodes()])
[0, 1, 2, 3, 4]
[4, 4, 4, 4, 4]Generator expressions are slightly different as they are evaluated lazily. These are specified using round braces, and if they are being expressed as a function argument, they can be specified without any braces. These are most often used in the context of aggregations like the max function:
g = (len(item) for item in items)
list(g)
[6, 1, 6]max(len(item) for item in items)6sorted(item.upper() for item in items)['BANANA', 'SPIDER', 'Y']Directed graphs
Unless otherwise specified, we assume graph edges are undirected – they are symmetric and go both ways. But some relationships, e.g. predator-prey relationships, are asymmetric and best represented as directed graphs. NetworkX provides the DiGraph class for directed graphs.
D = nx.DiGraph()

D.add_edges_from([(1,2),(2,3),(3,2),(3,4),(3,5),(4,5),(4,6),(5,6),(6,4),(4,2)])

nx.draw(D, with_labels=True)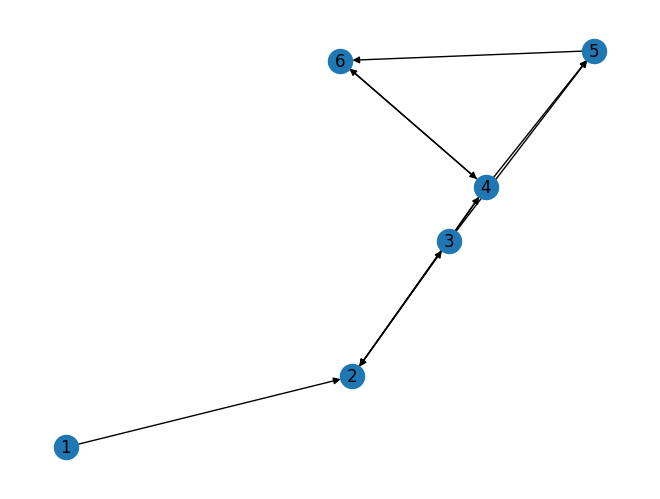
Note the asymmetry in graph methods dealing with edges such as has_edge():
D.has_edge(1,2)TrueD.has_edge(2,1)FalseInstead of the symmetric relationship “neighbors”, nodes in directed graphs have predecessors (“in-neighbors”) and successors (“out-neighbors”):
print('Successors of 2:', list(D.successors(2)))

print('Predecessors of 2:', list(D.predecessors(2)))
Successors of 2: [3]
Predecessors of 2: [1, 3, 4]Directed graphs have in-degree and out-degree, giving the number of edges pointing to and from the given node, respectively:
D.in_degree(2)3D.out_degree(2)1Caveat
Since NetworkX 2, the .degree() method on a directed graph gives the total degree: in-degree plus out-degree. However, in a bit of confusing nomenclature, the neighbors method is a synonym for successors, giving only the edges originating from the given node. This makes sense if you consider neighbors to be all the nodes reachable from the given node by following links, but it’s easy to make the mistake of writing .neighbors() in your code when you really want both predecessors and successors.
D.degree(2)4print('Successors of 2:', list(D.successors(2)))
print('"Neighbors" of 2:', list(D.neighbors(2)))Successors of 2: [3]
"Neighbors" of 2: [3]Assigning node attributes
Each node in a NetworkX graph has a dictionary of attributes associated with it. (empty by default) This dictionary can hold arbitrary data about a node. We can get the attributes for a single node by giving the node name to the nodes object.
# CREATE GRAPH WITH ATTRIBUTES
G1=nx.Graph()
G1.add_node(0, D=-1)
G1.add_node(1, D=-2)
print(G1)

# ACCESS ATTRIBUTES
print(G1.nodes[0]["D"])
print(G1.nodes[1]["D"])

# OVERWRITE ATTRIBUTE
G1.nodes[0]["D"]=100
print(nx.get_node_attributes(G1, 'D'))
Graph with 2 nodes and 0 edges
-1
-2
{0: 100, 1: -2}Example: Reading and writing
- You can also save the graph object to a file if needed
# import networkx as nx

# # SAVE TO FILE
# nx.write_edgelist(G, "./L1.txt")
# #nx.write_weighted_edgelist(G, "./L1.txt")
# nx.write_adjlist(G, "./L2.txt")
# #nx.write_multiline_adjlist(G, "./L2.txt")

# # READING
# # G=nx.read_edgelist("./L1.txt")
# # G=nx.read_weighted_edgelist("./write_weighted_edgelist.txt")
# # G=nx.read_adjlist("./L2.txt")
# # G=nx.read_multiline_adjlist("./multiline_adjlist.txt")

# G = nx.DiGraph()  # DIRECTED